
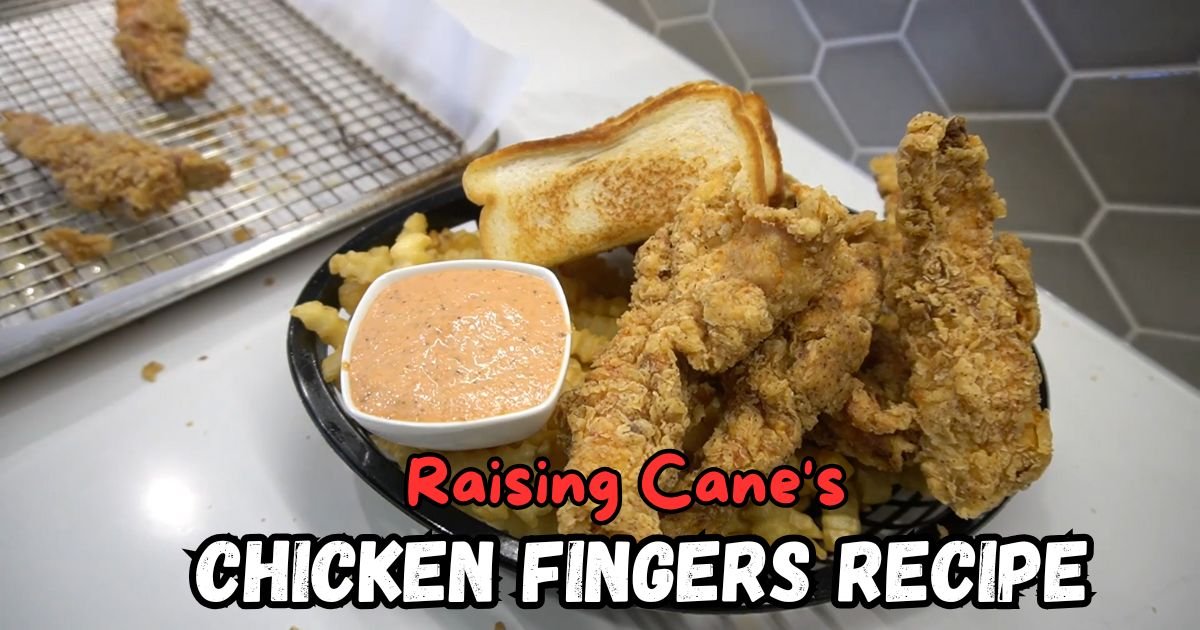
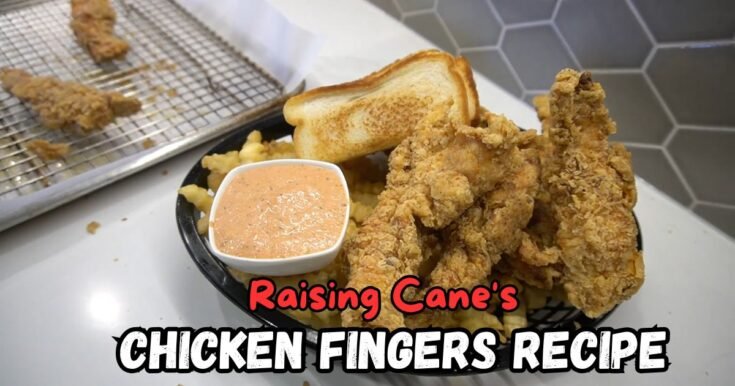
Raising Cane’s Chicken Fingers Recipe
I’ve always loved crispy chicken, and let me tell you—this Raising Cane’s chicken fingers recipe hits the spot every single time.
If you’ve ever had Cane’s, you know how tender their chicken is on the inside and how crunchy that golden crust is on the outside.
It’s simple, tasty, and hard to stop eating. That’s what makes this Raising Cane’s chicken fingers recipe so special.
I figured out how to make it at home with easy ingredients and steps. Let me show you how to make this crave-worthy meal in your own kitchen—no fancy skills needed!

Why I Love This Raising Cane’s Chicken Fingers Recipe
Here’s why this recipe is a winner:
- It’s easy! No complicated steps—just marinate, coat, fry, and enjoy.
- Tastes like the real thing. The marinade keeps the chicken moist, and the seasoning mix gives that signature crunch.
- Budget-friendly. Skip the drive-thru and feed a family for less.
- Customizable. Spice it up or keep it mild—it’s your call!
Ingredients You Will Need
Here’s everything you need to make the perfect Raising Cane’s chicken fingers at home:
- Chicken tenderloins – 1.5 pounds. Use fresh tenderloins if you can. They’re soft and cook evenly. You can also use chicken breasts cut into strips.
- Buttermilk – 1 cup. This helps to tenderize the chicken and give it flavor. I soak the chicken in this for a few hours.
- Eggs – 2 large. Helps bind the coating to the chicken.
- All-purpose flour – 1 ½ cups. For the base of the breading.
- Cornstarch – ½ cup. Makes the crust extra crispy.
- Garlic powder – 1 teaspoon. Adds flavor without being too strong.
- Paprika – 1 teaspoon. Gives the coating a nice color and mild spice.
- Salt – 1 ½ teaspoons. Season well for full flavor.
- Black pepper – 1 teaspoon. Just a little kick.
- Oil for frying – about 3 cups. I use vegetable or canola oil.
Helpful Swaps
- No buttermilk? Mix 1 cup of milk with 1 tablespoon of lemon juice or vinegar. Let it sit for 10 minutes.
- No cornstarch? Just use more flour, but the texture might not be as crispy.
- Want less salt? You can reduce it by half and it’ll still taste great.
Kitchen Appliances Needed
You don’t need anything fancy to make these chicken fingers:
- Large mixing bowls
- Whisk
- Tongs
- Deep frying pan or pot
- Paper towels
- Plate or tray for draining
- Thermometer (optional, but helpful for oil temp)
How To Make Raising Cane’s Chicken Fingers Recipe
Let’s get cooking! Here’s my step-by-step guide to making this delicious dish at home.
Step 1 | Soak the Chicken
Place the chicken tenderloins in a bowl. Pour in the buttermilk and stir in a pinch of salt and pepper.
Let it soak for at least 2 hours in the fridge. I usually leave mine overnight. This makes the chicken extra juicy.
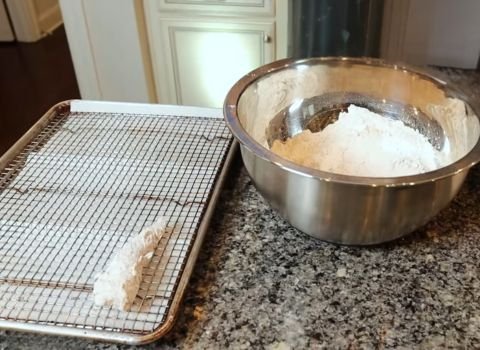
Step 2 | Prepare the Coating
In another bowl, mix the flour, cornstarch, garlic powder, paprika, salt, and black pepper. Crack the eggs in a separate bowl and beat them well.
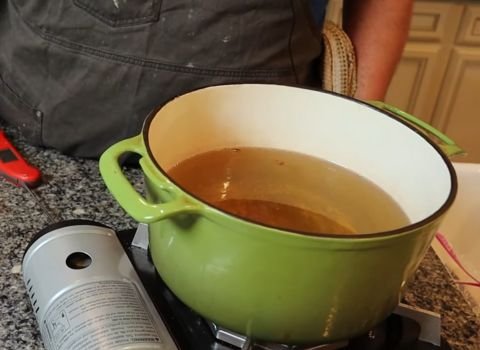
Step 3 | Heat the Oil
Pour oil into a deep pan or pot. Heat it over medium heat. Use a thermometer if you have one. You’re aiming for 350°F (about 175°C). If you don’t have one, drop a little flour in—it should sizzle.
Step 4 | Coat the Chicken
Take each piece of chicken out of the buttermilk. Dip it in the flour mix, then in the egg, then back in the flour again. Press the flour on so it sticks well.
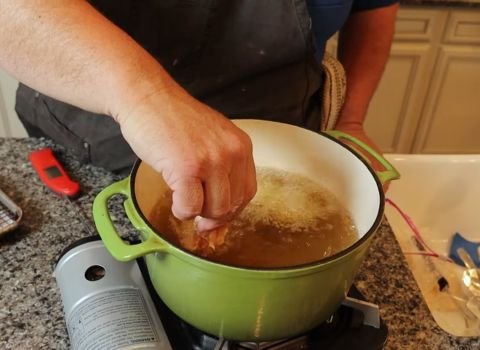
Step 5 | Fry the Chicken
Carefully place the coated chicken into the hot oil. Fry 3-4 pieces at a time, don’t overcrowd the pan. Cook for about 4-5 minutes on each side or until golden brown and cooked through.
Step 6 | Drain and Cool
Use tongs to take the chicken out and place it on a paper towel-lined plate. Let it rest for a minute or two.

Tips for Making Perfect Chicken Fingers
- Don’t skip the soak—it really makes a difference.
- Double dip in flour for extra crunch.
- Keep your oil at the right temp, or they’ll get greasy.
- Let the chicken rest after frying so it stays crispy.
How To Serve Raising Cane’s Chicken Fingers
I like to keep it classic. Serve these chicken fingers with crinkle-cut fries and a side of dipping sauce—preferably Cane’s sauce!
Toasted bread and a simple coleslaw also make it feel just like the restaurant. And if you’re eating right away, serve while they’re hot and crispy for the best taste.
How To Store Raising Cane’s Chicken Fingers
If you have leftovers (which is rare in my house), let them cool down completely before storing. Place them in an airtight container and pop them in the fridge. They’ll stay good for up to 3 days.
To reheat, I suggest using the oven or air fryer so they stay crispy. Just warm them at 375°F for about 10 minutes.
Raising Cane’s Chicken Fingers Recipe FAQs
1. Can I bake instead of fry?
Yes, you can bake them at 400°F for 20-25 minutes. Flip halfway through. They won’t be as crispy but still tasty.
2. Can I use chicken breast instead of tenderloins?
Totally. Just slice them into strips before soaking and cooking.
3. Why is my coating falling off?
Make sure the chicken isn’t too wet and press the flour on firmly. Resting before frying also helps.
4. Can I make these ahead of time?
Yes, you can bread them and keep in the fridge for a few hours before frying.
5. How do I keep them crispy?
Drain them well on paper towels and don’t stack while hot.
6. How long should I marinate the chicken?
At least 2 hours, but overnight is best for full flavor and softness.
Raising Cane's Chicken Fingers Recipe
Make Raising Cane's Chicken Fingers at home in just 2.5 hours! This crispy, juicy chicken recipe is the perfect comfort food for any day.
Ingredients
- Chicken tenderloins – 1.5 pounds
- Buttermilk – 1 cup
- Eggs – 2 large
- All-purpose flour – 1 ½ cups
- Cornstarch – ½ cup
- Garlic powder – 1 teaspoon
- Paprika – 1 teaspoon
- Salt – 1 ½ teaspoons
- Black pepper – 1 teaspoon
- Oil for frying – About 3 cups (vegetable or canola oil)
Instructions
Step 1 | Soak the Chicken
Place the chicken tenderloins in a bowl. Pour in the buttermilk and stir in a pinch of salt and pepper. Let it soak for at least 2 hours in the fridge. I usually leave mine overnight. This makes the chicken extra juicy.
Step 2 | Prepare the Coating
In another bowl, mix the flour, cornstarch, garlic powder, paprika, salt, and black pepper. Crack the eggs in a separate bowl and beat them well.
Step 3 | Heat the Oil
Pour oil into a deep pan or pot. Heat it over medium heat. Use a thermometer if you have one. You're aiming for 350°F (about 175°C). If you don’t have one, drop a little flour in—it should sizzle.
Step 4 | Coat the Chicken
Take each piece of chicken out of the buttermilk. Dip it in the flour mix, then in the egg, then back in the flour again. Press the flour on so it sticks well.
Step 5 | Fry the Chicken
Carefully place the coated chicken into the hot oil. Fry 3-4 pieces at a time, don’t overcrowd the pan. Cook for about 4-5 minutes on each side or until golden brown and cooked through.
Step 6 | Drain and Cool
Use tongs to take the chicken out and place it on a paper towel-lined plate. Let it rest for a minute or two.
Nutrition Information:
Serving Size: 1Amount Per Serving: Calories: 560Total Fat: 30gSaturated Fat: 5gCholesterol: 170mgSodium: 950mgCarbohydrates: 35gFiber: 1gSugar: 2gProtein: 34g
Conclusion
This Raising Cane’s chicken fingers recipe is one of my favorite go-to meals when I’m craving something crunchy, juicy, and full of flavor. It’s simple to make, and the taste is seriously amazing.
If you try this recipe, I hope you love it as much as I do. Feel free to share how yours turned out—I’d love to hear! And don’t forget to follow us on Pinterest for more home-style recipes just like this one.