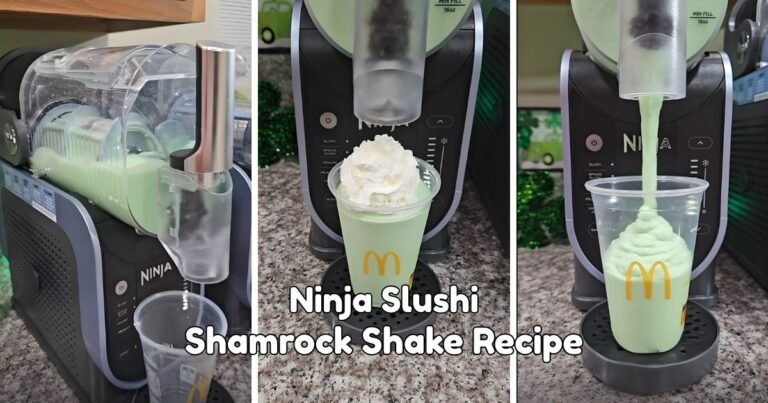

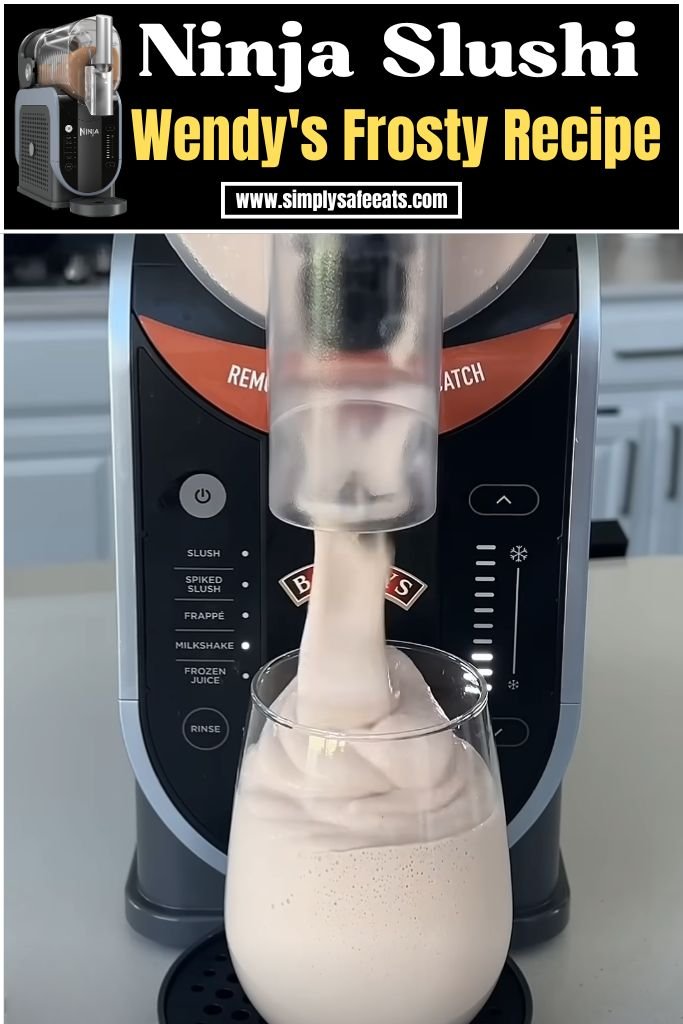
Ninja Slushi Wendy’s Frosty Recipe
I always loved the cold, creamy taste of a Wendy’s Frosty. It’s smooth like ice cream but soft enough to sip with a straw.
One day, I thought, Why not try making it at home? So I gave it a go using my Ninja Slushi machine, and the result blew me away. It turned out just right cold, chocolatey, and so creamy.
If you’ve got a Ninja Slushi like me, you’re going to love this recipe. No blender needed. No ice. Just mix the ingredients, pour them in, and let the machine do the work. It’s simple, tasty, and feels like a real treat.
And hey, if you enjoy this one, you might also like my Ninja Slushi Jack Frost Recipe. Now, let’s get into it and I’ll show you how to make this frosty favorite at home!
Why You Love This Ninja Slushi Wendy’s Frosty
This Ninja Slushi Wendy’s Frosty Recipe is a total winner, and here’s why:
- So Easy: You only need a few ingredients, and the Ninja Slushi does most of the work.
- Tastes Like the Real Deal: It’s creamy, chocolatey, and has that perfect Frosty texture.
- Fun for Everyone: Kids and adults go crazy for this dessert.
- No Drive-Thru Needed: Make it at home anytime you want.
- Customizable: Add your favorite flavors or toppings to make it your own.
I love how this recipe brings back memories of grabbing a Frosty with fries after school. It’s quick to make, and the Ninja Slushi churns it into a smooth, dreamy treat.
Ninja Slushi Wendy’s Frosty Ingredients
Here’s what you’ll need to make this delicious Frosty. Each ingredient plays a big role in getting that perfect texture and flavor.
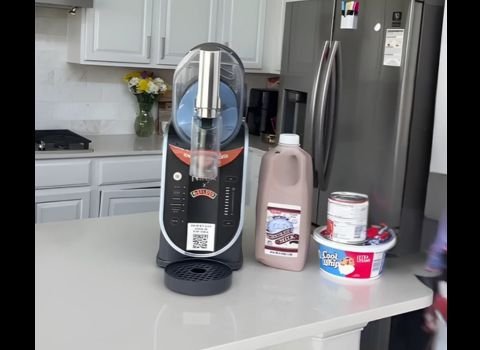
- Chocolate Milk (4 cups): This is the star of the show! I use whole chocolate milk for that rich, creamy taste. Fairlife Chocolate Milk is my go-to because it’s higher in protein and has a smooth flavor. Make sure it’s cold from the fridge to help the Ninja Slushi freeze it faster. You can use low-fat or even plant-based chocolate milk, but whole milk gives the best Frosty-like texture.
- Sweetened Condensed Milk (1/2 cup): This adds sweetness and makes the Frosty extra creamy. It’s thick and sticky, which helps create that spoonable texture we all love. Look for it in a can near the baking aisle.
- Whipped Topping (1 cup, like Cool Whip): This gives the Frosty its light, airy feel. Cool Whip works great, but you can whip your own cream if you prefer. It blends in smoothly and makes the dessert less heavy.
- Vanilla Extract (1 teaspoon, optional): I add a splash of vanilla to boost the flavor. It’s not in the original Frosty, but it gives a little extra yum. Use pure vanilla extract for the best taste.
Helpful Swaps
Don’t have the exact ingredients? No problem! Here are some easy swaps:
- Chocolate Milk: If you don’t have chocolate milk, mix regular milk with 2 tablespoons of chocolate syrup or cocoa powder. It won’t be as rich, but it still works.
- Sweetened Condensed Milk: Try evaporated milk with a tablespoon of sugar if you’re out of condensed milk. It’s not as thick, so add a bit less.
- Whipped Topping: Make your own by whipping 1 cup of heavy cream with 2 tablespoons of sugar until fluffy. For a dairy-free option, use coconut whipped cream.
- Vanilla Extract: Skip it if you don’t have it, or use a pinch of vanilla powder.
Kitchen Equipment Needed
You don’t need much to make this Frosty, but here’s what I use:
- Ninja Slushi Machine: The star of this recipe! It freezes and churns the mixture into a perfect Frosty texture.
- Large Mixing Bowl: A bowl big enough to mix all the ingredients smoothly.
- Whisk or Spoon: For blending the ingredients together. A whisk makes it easier to combine everything.
- Measuring Cups and Spoons: To measure the chocolate milk, condensed milk, and vanilla extract accurately.
- Liquid Measuring Cup with Spout: This makes pouring the mixture into the Ninja Slushi super easy.
- Glasses or Cups: For serving your Frosty. I like using tall glasses for that classic look.
How To Make Ninja Slushi Wendy’s Frosty
Making this Ninja Slushi Wendy’s Frosty Recipe is so simple, even if you’re new to cooking. Follow these steps, and you’ll have a creamy, chocolatey treat in no time. I’ve broken it down so it’s easy to follow.
Step 1 | Get Your Ingredients Ready
Grab your chocolate milk, sweetened condensed milk, whipped topping, and vanilla extract (if using).
Make sure the chocolate milk is cold it helps the Ninja Slushi work faster. I always keep mine in the fridge overnight.
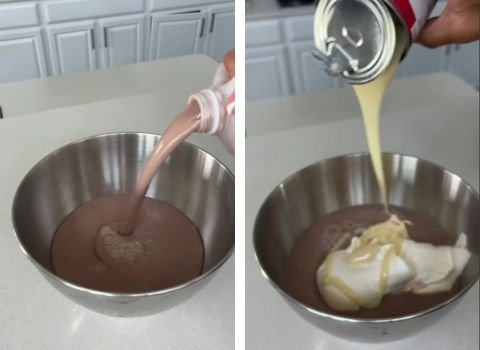
Step 2 | Mix the Ingredients
In a large mixing bowl, pour in 1/2 cup of sweetened condensed milk and 1 cup of whipped topping. Stir them together with a whisk or spoon until they’re smooth.
This part smells so good! Slowly add 4 cups of cold chocolate milk, stirring as you go to make sure it’s all blended. If you’re using vanilla extract, add 1 teaspoon now and mix it in.
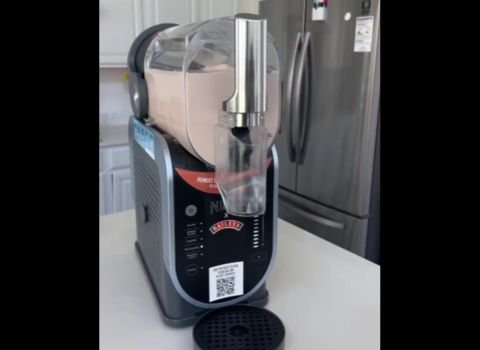
Step 3 | Prep the Ninja Slushi
Make sure your Ninja Slushi machine is clean and set up on a flat surface. Check that the condensation catch is in place under the evaporator.
Slide the auger over the evaporator and lock it in. Then, put the vessel over the auger and push the bail handle back to seal it tight.
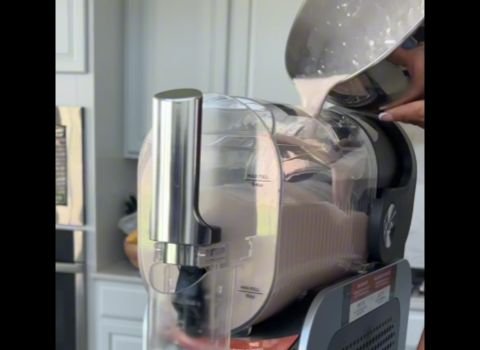
Step 4 | Pour the Mixture
Open the cover on top of the Ninja Slushi. Pour your chocolatey mixture through the easy-fill port. Don’t fill past the 64-ounce max line 4 cups is perfect. Close the cover when you’re done.
Step 5 | Start the Machine
Plug in the Ninja Slushi and press the power button. Select the “Milkshake” preset. The machine will start churning and freezing.
It usually takes 15-30 minutes, depending on how cold your ingredients are. The machine will beep when it’s ready, and the lights will stop pulsing.
Step 6 | Check the Texture
When the machine beeps, check the Frosty. If it’s not thick enough, press the up button to increase the freezing level and let it churn a bit longer. I sometimes do this for an extra thick Frosty.
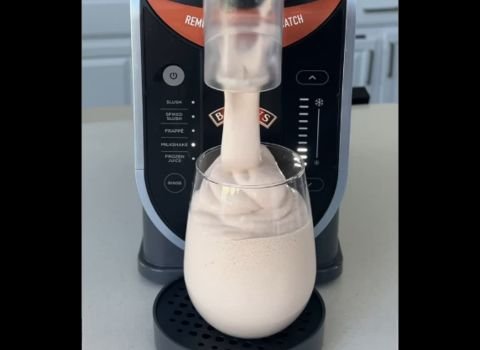
Step 7 | Serve It Up
Place a glass under the spout, pull the handle slowly, and watch the creamy Frosty flow out. It’s so fun to see it fill the glass! Serve it right away with a spoon or straw.
Recipe Tips for Success
Here are some quick tips to make your Frosty perfect every time:
- Use Cold Ingredients: Chilled chocolate milk freezes faster and gives a smoother texture.
- Don’t Overfill: Stick to 4 cups of liquid to avoid spills in the Ninja Slushi.
- Blend Well: Make sure the whipped topping is fully mixed in to avoid lumps.
- Taste Test: If you want it sweeter, add a bit more condensed milk before freezing.
- Clean Right Away: Rinse the Ninja Slushi parts soon after using to make cleanup easier.
- Adjust Thickness: If it’s too thick, add a splash of chocolate milk and churn again.
Ninja Slushi Wendy’s Frosty Serving Suggestions
This Ninja Slushi Wendy’s Frosty is so fun to serve! Here are some ideas to make it even better:
- Classic Combo: Serve with a side of crispy fries for dipping, just like at Wendy’s.
- Top It Off: Add whipped cream, chocolate sprinkles, or a drizzle of caramel sauce.
- Fun Glasses: Use tall glasses or mason jars for a cute, retro vibe.
- Pair with Dessert: Enjoy it with cookies or brownies for a sweet treat.
- Kids’ Party: Serve in small cups with colorful straws for a fun dessert.
How to Store Ninja Slushi Wendy’s Frosty
If you have leftovers (which is rare because it’s so yummy!), here’s how to store your Ninja Slushi Wendy’s Frosty.
Keep it in the Ninja Slushi machine if you plan to eat it soon—it can stay frozen for up to 12 hours while the machine runs.
If you need to store it longer, pour the Frosty into an airtight container and pop it in the freezer.
It’ll stay good for up to a month. When you’re ready to eat, let it sit at room temperature for 5-10 minutes to soften, then stir or blend it to get that creamy texture back. I like to store mine in small containers so I can grab a quick treat whenever I want.
Ninja Slushi Wendy’s Frosty Recipe FAQs
1. Can I use regular milk instead of chocolate milk?
Yes, you can! Mix 4 cups of regular milk with 2-3 tablespoons of chocolate syrup or cocoa powder. It won’t be as rich, but it still tastes great.
Make sure to blend it well before pouring it into the Ninja Slushi. Whole milk works best for a creamy texture, but 2% or plant-based milk like almond or oat milk can work too. Just know the Frosty might be a bit thinner.
2. How long does it take to make the Frosty in the Ninja Slushi?
It usually takes 15-30 minutes, depending on how cold your ingredients are. If you use refrigerated chocolate milk, it freezes faster.
The machine beeps when it’s done, but you can add a few extra minutes if you want it thicker. Keep an eye on the texture to get it just right.
3. Can I make this dairy-free?
Absolutely! Use plant-based chocolate milk, like oat or almond milk, and dairy-free whipped topping, like coconut whipped cream.
The texture might be a little less creamy, but it’s still delicious. You can also swap sweetened condensed milk for a dairy-free version or use coconut milk with a bit of sugar.
4. What if my Frosty is too thick or too thin?
If it’s too thick, add a tablespoon of chocolate milk and churn again. If it’s too thin, let the Ninja Slushi run a bit longer or add more whipped topping before freezing.
Adjust slowly to get the perfect Frosty texture—thick enough for a spoon but smooth enough for a straw.
5. Can I add other flavors to the Frosty?
Yes, you can get creative! Try adding a teaspoon of peanut butter, a drizzle of caramel, or a pinch of cinnamon for a twist.
Just blend these into the mixture before pouring it into the Ninja Slushi. Don’t add solid mix-ins like cookies—they can jam the machine.
6. What if I don’t have a Ninja Slushi machine?
You can still make a Frosty! Blend the ingredients with 1-2 cups of ice in a high-powered blender until smooth.
If it’s too thick, add more milk; if it’s too thin, add more ice. It won’t be as perfect as the Ninja Slushi version, but it’s still yummy.

Ninja Slushi Wendy's Frosty Recipe

Make a Ninja Slushi Wendy's Frosty in just 25 minutes! Creamy, chocolatey, and quick to make with 4 simple ingredients. Your new favorite summer treat!
Ingredients
- 4 cups whole chocolate milk (preferably Fairlife)
- 1/2 cup sweetened condensed milk
- 1 cup whipped topping (like Cool Whip)
- 1 teaspoon vanilla extract (optional)
Instructions
Step 1 | Get Your Ingredients Ready
Grab your chocolate milk, sweetened condensed milk, whipped topping, and vanilla extract (if using). Make sure the chocolate milk is cold—it helps the Ninja Slushi work faster. I always keep mine in the fridge overnight.
Step 2 | Mix the Ingredients
In a large mixing bowl, pour in 1/2 cup of sweetened condensed milk and 1 cup of whipped topping. Stir them together with a whisk or spoon until they’re smooth. This part smells so good! Slowly add 4 cups of cold chocolate milk, stirring as you go to make sure it’s all blended. If you’re using vanilla extract, add 1 teaspoon now and mix it in.
Step 3 | Prep the Ninja Slushi
Make sure your Ninja Slushi machine is clean and set up on a flat surface. Check that the condensation catch is in place under the evaporator. Slide the auger over the evaporator and lock it in. Then, put the vessel over the auger and push the bail handle back to seal it tight.
Step 4 | Pour the Mixture
Open the cover on top of the Ninja Slushi. Pour your chocolatey mixture through the easy-fill port. Don’t fill past the 64-ounce max line—4 cups is perfect. Close the cover when you’re done.
Step 5 | Start the Machine
Plug in the Ninja Slushi and press the power button. Select the “Milkshake” preset. The machine will start churning and freezing. It usually takes 15-30 minutes, depending on how cold your ingredients are. The machine will beep when it’s ready, and the lights will stop pulsing.
Step 6 | Check the Texture
When the machine beeps, check the Frosty. If it’s not thick enough, press the up button to increase the freezing level and let it churn a bit longer. I sometimes do this for an extra thick Frosty.
Step 7 | Serve It Up
Place a glass under the spout, pull the handle slowly, and watch the creamy Frosty flow out. It’s so fun to see it fill the glass! Serve it right away with a spoon or straw.
Nutrition Information:
Serving Size: 1Amount Per Serving: Calories: 280Total Fat: 9gSaturated Fat: 6gCholesterol: 35mgSodium: 160mgCarbohydrates: 38gSugar: 35gProtein: 9g
Did you make this Ninja Slushi Wendy’s Frosty Recipe? Please leave a ⭐ rating and review!