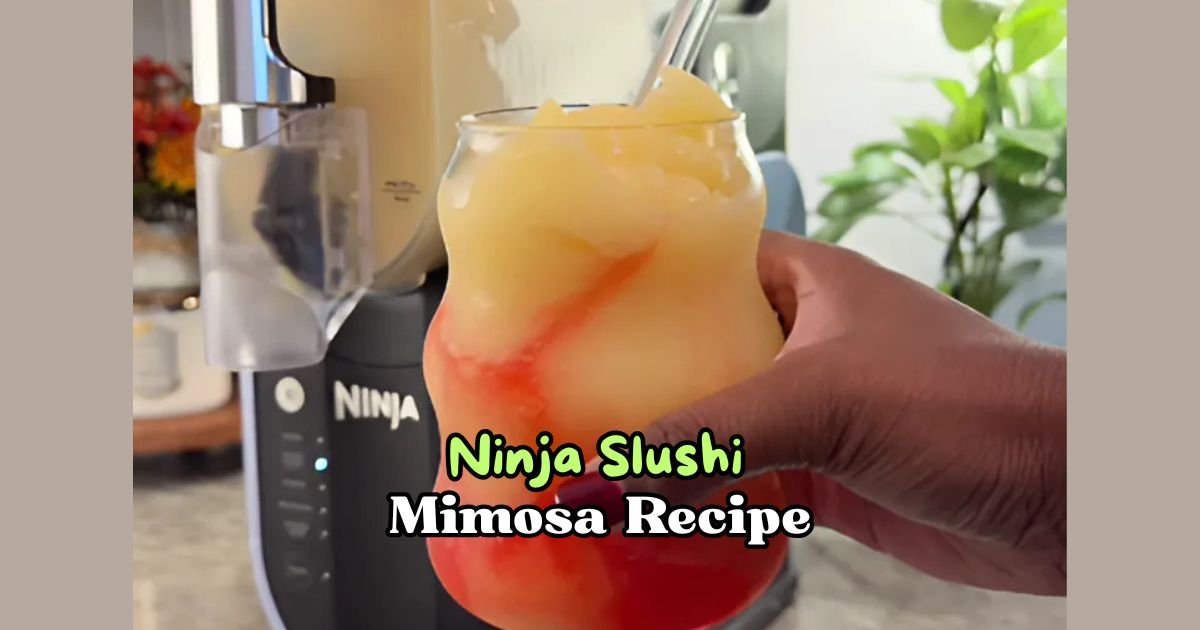
Ninja Slushi Mimosa Recipe
Looking for something cold, fruity, and just a little fancy? My Ninja Slushi Mimosa Recipe is the perfect drink to try at home.
If you love orange juice and sparkling drinks, you’ll enjoy how easy this recipe is using the Ninja Slushi machine. It takes a simple mimosa and turns it into a fun, icy treat.
I made this one morning when I wanted something different for brunch, and now it’s my go-to! The texture is smooth and slushy, not too icy, and just the right sweetness.
You’ll love how fresh it tastes, and it’s perfect for relaxing weekends. Want another great drink to try next? Check out my Ninja Slushi Pina Colada Recipe—that one is another favorite of mine!
Why You Love This Ninja Slushi Mimosa
This Ninja Slushi Mimosa is a game-changer for any brunch or sunny day. Here’s why you’ll fall in love with it:
- Super Easy: The Ninja Slushi machine does all the hard work. Just pour in the ingredients and wait for the magic!
- Refreshing Taste: The mix of bubbly champagne and tangy orange juice is cool and crisp.
- Fun Texture: The slushy feel makes every sip exciting and different from a regular mimosa.
- Perfect for Any Time: Great for breakfast, lunch, or a chill afternoon with friends.
I can’t get enough of how simple this drink is to make. The Ninja Slushi turns two basic ingredients into a frosty, fun cocktail that everyone enjoys.
Ninja Slushi Mimosa Ingredients
Here’s what you need to make this yummy Ninja Slushi Mimosa. I’ll explain each ingredient so you know exactly what to grab:
- Champagne or Sparkling Wine (750 mL bottle, chilled): This gives the mimosa its fizzy, festive vibe. I like using a dry (brut) champagne or prosecco because it’s not too sweet. Pick one you’d drink on its own. Prosecco is budget-friendly, but champagne feels fancy. Make sure it’s cold before using!
- Pulp-Free Orange Juice (24 ounces, chilled): The orange juice adds a bright, citrusy flavor. Pulp-free is best because it keeps the slushy smooth. I use store-bought, like Simply Orange, or fresh-squeezed if I have time. Chill it in the fridge overnight for the best results.
- Sugar Syrup (2 tablespoons, optional): This adds a touch of sweetness if your juice or wine is tart. I make mine by mixing equal parts sugar and water over heat until dissolved. Let it cool before using. You can skip it if you like a tangier drink.
Helpful Swaps
If you don’t have the exact ingredients, no worries! Here are some easy swaps:
- No Champagne? Use sparkling white grape juice for a non-alcoholic version or cava for a cheaper option.
- Out of Orange Juice? Try grapefruit juice for a tangy twist or pineapple juice for a tropical vibe.
- No Sugar Syrup? A teaspoon of honey or agave nectar works, but mix it well with the juice first.
- Want a Different Flavor? Blend in a few fresh strawberries or peaches with the orange juice for a fruity spin.
Kitchen Equipment Needed
To make this Ninja Slushi Mimosa, you’ll need:
- Ninja Slushi Machine: The star of the show! It freezes and slushes your drink perfectly.
- Measuring Cup: For pouring the right amount of orange juice and syrup.
- Champagne Flutes or Glasses: To serve your slushy mimosa in style. Chill them in the fridge first.
- Spoon or Whisk: To mix the sugar syrup with the juice if you’re using it.
- Small Saucepan (optional): If you need to make sugar syrup from scratch.
How To Make Ninja Slushi Mimosa
Making this Ninja Slushi Mimosa is so easy, even if you’re new to cooking or mixing drinks. Follow these steps, and you’ll have a frosty cocktail in no time:
Step 1 | Get Your Ingredients Ready
Make sure your champagne and orange juice are chilled. If you’re using sugar syrup, mix 2 tablespoons of it with the orange juice in a measuring cup. Stir until it’s blended. This step is optional if you don’t want extra sweetness.
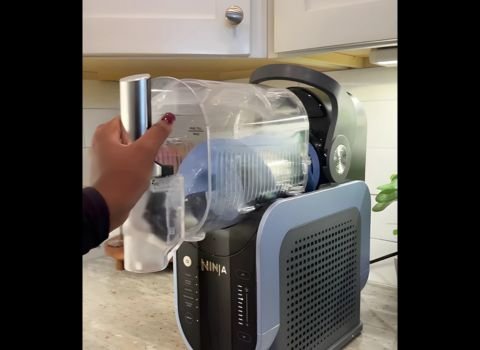
Step 2 | Set Up the Ninja Slushi
Place the machine on a flat counter. Clean all parts, like the vessel and auger, before starting. Slide the condensation catch into the grooves under the evaporator.
Then, put the auger over the evaporator and twist it until it clicks. Slide the vessel over the auger, and lock it by pushing the bail handle down. Add the drip tray in front of the base.
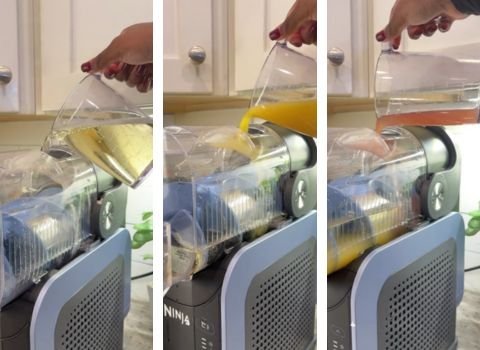
Step 3 | Pour in the Ingredients
Open the cover on the vessel’s top. Pour in the 750 mL bottle of chilled champagne first. Then, add the 24 ounces of chilled orange juice (with sugar syrup if you mixed it). Close the cover tightly. Don’t add ice or hot liquids!
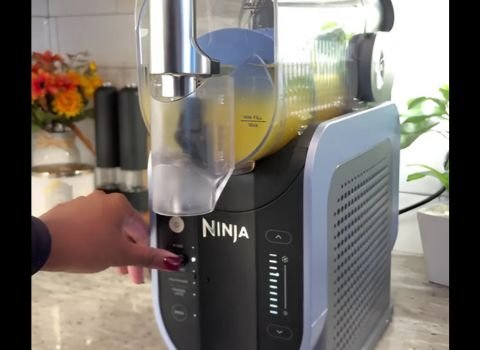
Step 4 | Choose the Preset
Plug in the machine and press the power button. Select the “SPIKED SLUSH” preset. This is perfect for drinks with alcohol like this mimosa.
The machine starts at the default temperature for a great slushy texture. If you want it thicker, adjust the temperature up, or lower it for a thinner slush.
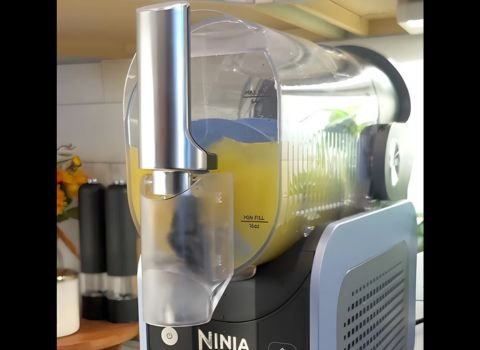
Step 5 | Wait for the Magic
The Ninja Slushi will take 15–60 minutes to freeze your drink, depending on how cold your ingredients were.
The lights on the machine pulse while it’s working. When it’s ready, it beeps three times, and the lights stay solid. Your mimosa is now perfectly slushy!
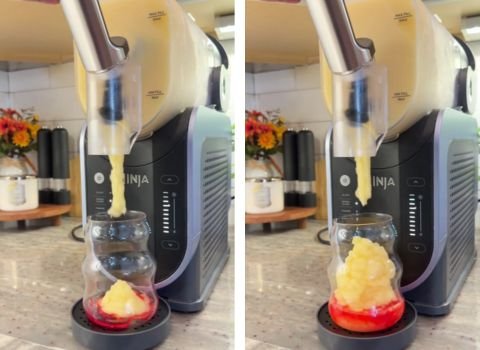
Step 6 | Serve It Up
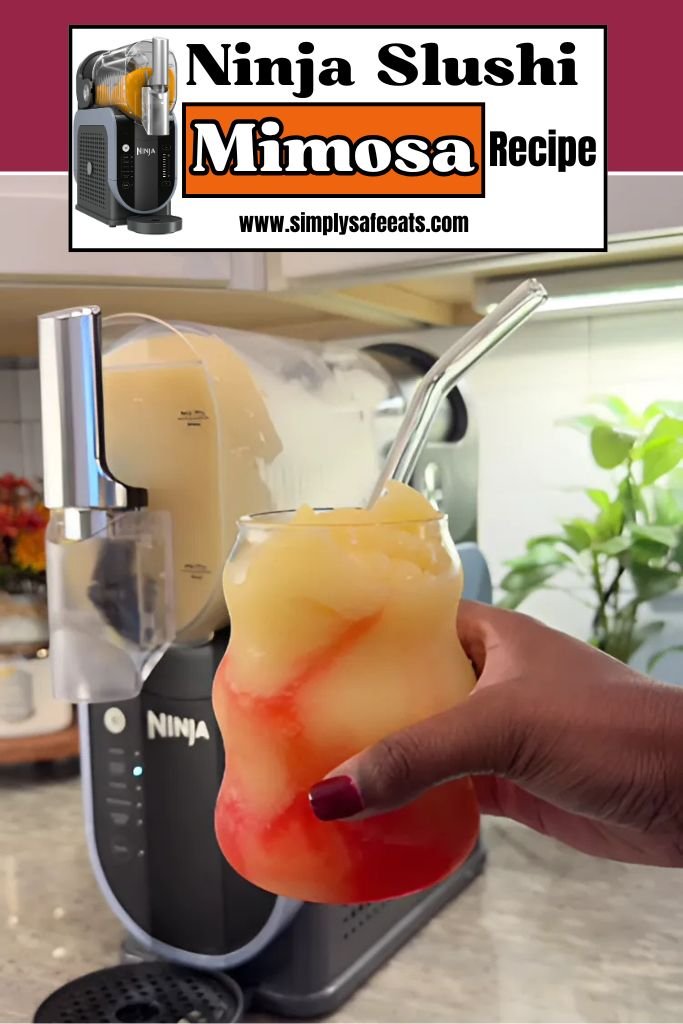
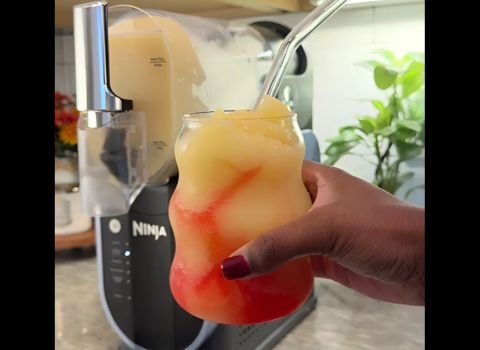
Place a chilled champagne flute or glass on the drip tray under the handle. Slowly pull the handle to pour the slushy mimosa into the glass.
Stop when the glass is full by releasing the handle. Garnish with a slice of orange or a strawberry if you want it to look fancy.
Step 7 | Enjoy Right Away
Sip your mimosa while it’s cold and frosty. The Ninja Slushi keeps the drink frozen for up to 12 hours, so you can pour more later if you don’t finish it all.
Recipe Tips for Success
Here are some quick tips to make your Ninja Slushi Mimosa perfect every time:
- Chill Everything: Cold ingredients freeze faster and taste better.
- Avoid Pulp: Pulp can clog the machine or make the texture weird.
- Don’t Overfill: Stick to the 64-ounce max to prevent spills.
- Clean After Use: Run the rinse cycle to keep the machine ready for next time.
- Taste First: Try a small sip before serving to check if it needs more sweetness.
Ninja Slushi Mimosa Serving Suggestion
Your Ninja Slushi Mimosa is ready to shine! Here’s how to serve it for maximum fun:
- Chilled Glasses: Pop your glasses in the fridge for 10 minutes before pouring.
- Pretty Garnishes: Add an orange slice or a fresh berry on the glass rim.
- Brunch Pairings: Serve with pancakes, eggs, or fruit salad for a sunny meal.
- Outdoor Vibes: Enjoy it on a patio or at a picnic for a refreshing treat.
How to Store Ninja Slushi Mimosa
If you have leftover Ninja Slushi Mimosa, here’s how to store it:
You can’t keep the slushy texture forever, but pour any extra into an airtight container and store it in the fridge for up to 24 hours.
It’ll melt into a liquid, but you can pour it back into the Ninja Slushi to refreeze. For longer storage, freeze the liquid in a freezer-safe container for up to a week.
Thaw it in the fridge before using it again. I don’t recommend freezing it as a slushy because it gets hard and loses its fizz. Always drink it fresh for the best taste!
Ninja Slushi Mimosa Recipe FAQs
1. Can I make this mimosa without alcohol?
Yes! Swap the champagne for sparkling white grape juice or ginger ale. It’ll still be fizzy and fun. Use the “SLUSH” preset instead of “SPIKED SLUSH” for non-alcoholic drinks.
The Ninja Slushi works just as well, and you’ll get a smooth, frosty texture. Add a bit more sugar syrup if the juice is tart. Kids and non-drinkers love this version!
2. What if my mimosa isn’t slushy enough?
If it’s too liquidy, your ingredients might not be cold enough. Chill them in the fridge overnight next time. You can also adjust the temperature setting on the Ninja Slushi to make it thicker.
Let it run a bit longer after the beeps. If it’s still not right, add a tablespoon of sugar syrup to help it freeze better.
3. Can I use other juices instead of orange?
Absolutely! Grapefruit juice gives a tangy kick, while pineapple juice makes it tropical. Blend in strawberries or peaches for a fruity twist. Just make sure the juice is pulp-free and chilled.
Stick to the same amount (24 ounces) to keep the ratio right. Experiment to find your favorite flavor!
4. How do I clean the Ninja Slushi after making this?
It’s easy! Run the rinse cycle with warm water after dispensing all the mimosa. Then, take apart the vessel, auger, and drip tray.
Wash them with soap and water or pop them in the dishwasher. Wipe the base with a damp cloth. Cleaning keeps the machine ready for your next drink.
5. Can I make this for a big crowd?
Yes, the Ninja Slushi holds up to 64 ounces, enough for 8–10 servings. Double the recipe if you have two machines or make batches.
Keep extra ingredients chilled and ready to pour. Serve in a pitcher with ice to keep it cold, but pour into glasses right away to avoid losing fizz.
6. What if the machine beeps and stops?
This means the sugar or alcohol ratio is off. Add a tablespoon of sugar syrup if it’s too low on sugar, or more orange juice if the alcohol is too strong.
Check the lights on the machine—they flash to show the issue. Stir the mix gently and restart the preset. It’ll work smoothly after that.
Ninja Slushi Mimosa Recipe

Cool down in just 35 minutes with this frosty Ninja Slushi Mimosa recipe! A citrusy, bubbly cocktail made fast using the Ninja Slushi—perfect for brunch!
Ingredients
- Champagne or Sparkling Wine (Brut or Prosecco): 750 mL, chilled
- Pulp-Free Orange Juice: 24 oz, chilled
- Sugar Syrup (optional): 2 tablespoons
Instructions
Step 1 | Get Your Ingredients Ready
Make sure your champagne and orange juice are chilled. If you’re using sugar syrup, mix 2 tablespoons of it with the orange juice in a measuring cup. Stir until it’s blended. This step is optional if you don’t want extra sweetness.
Step 2 | Set Up the Ninja Slushi
Place the machine on a flat counter. Clean all parts, like the vessel and auger, before starting. Slide the condensation catch into the grooves under the evaporator. Then, put the auger over the evaporator and twist it until it clicks. Slide the vessel over the auger, and lock it by pushing the bail handle down. Add the drip tray in front of the base.
Step 3 | Pour in the Ingredients
Open the cover on the vessel’s top. Pour in the 750 mL bottle of chilled champagne first. Then, add the 24 ounces of chilled orange juice (with sugar syrup if you mixed it). Close the cover tightly. Don’t add ice or hot liquids!
Step 4 | Choose the Preset
Plug in the machine and press the power button. Select the “SPIKED SLUSH” preset. This is perfect for drinks with alcohol like this mimosa. The machine starts at the default temperature for a great slushy texture. If you want it thicker, adjust the temperature up, or lower it for a thinner slush.
Step 5 | Wait for the Magic
The Ninja Slushi will take 15–60 minutes to freeze your drink, depending on how cold your ingredients were. The lights on the machine pulse while it’s working. When it’s ready, it beeps three times, and the lights stay solid. Your mimosa is now perfectly slushy!
Step 6 | Serve It Up
Place a chilled champagne flute or glass on the drip tray under the handle. Slowly pull the handle to pour the slushy mimosa into the glass. Stop when the glass is full by releasing the handle. Garnish with a slice of orange or a strawberry if you want it to look fancy.
Step 7 | Enjoy Right Away
Sip your mimosa while it’s cold and frosty. The Ninja Slushi keeps the drink frozen for up to 12 hours, so you can pour more later if you don’t finish it all.
Nutrition Information:
Serving Size: 1Amount Per Serving: Calories: 145Sodium: 5mgCarbohydrates: 14.5gFiber: 0.2gSugar: 12.5gProtein: 0.5g
Did you make this Ninja Slushi Mimosa Recipe? Please leave a ⭐ rating and review!