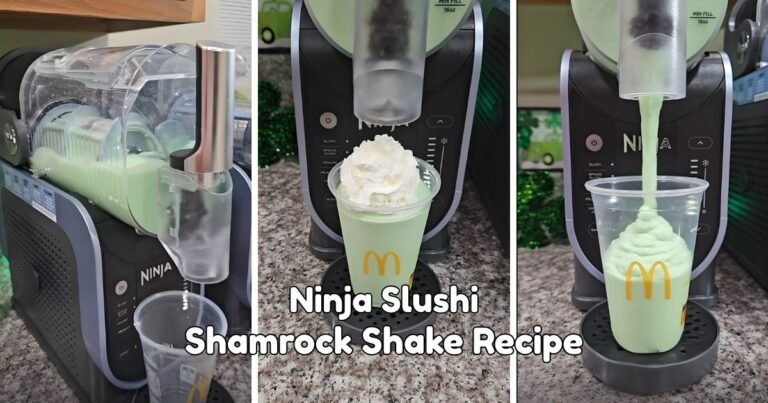

Ninja Slushi Milkshake Recipe
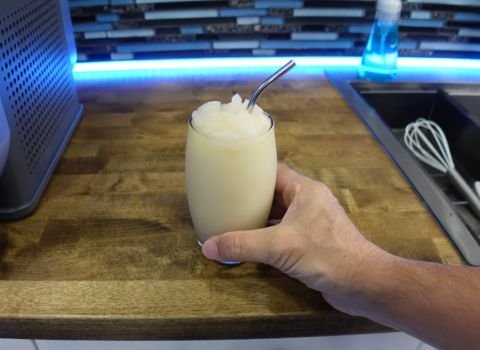
I love making milkshakes at home, and my Ninja Slushi machine has changed everything! This Ninja Slushi Milkshake Recipe creates the most amazing frozen drink that tastes just like the ones from ice cream shops.
You can make it right in your kitchen with simple ingredients. My family asks for this creamy, cold treat every hot day. The Ninja Slushi machine does all the hard work – you just add your milk, flavors, and watch it turn into magic.
This recipe is so easy that anyone can make it. Trust me, once you try this homemade milkshake, you’ll never want store-bought again.
It’s creamy, smooth, and perfect every time. You can also try my Lemonade Recipe for another refreshing drink option.

Why You’ll Love This Ninja Slushi Milkshake
This Ninja Slushi Milkshake Recipe will become your go-to frozen drink for so many reasons. Here’s what makes it special:
- Super Easy to Make – Just add ingredients and press a button
- Perfect Texture Every Time – The machine controls temperature perfectly
- Customizable Flavors – Add any flavor you love
- No Ice Needed – The machine freezes everything for you
- Ready in Minutes – Much faster than traditional methods
- Restaurant Quality – Tastes like professional milkshakes
Ninja Slushi Milkshake Ingredients
Here are all the ingredients you need for this amazing milkshake:
- Whole Milk (2 cups) – This is the base of your milkshake. Whole milk gives the richest, creamiest texture. You can use 2% milk, but whole milk makes it taste better. The fat content helps create that thick consistency we all love.
- Vanilla Ice Cream (1 cup, softened) – Use good quality vanilla ice cream. Let it sit out for 10 minutes before using so it blends easier. This adds sweetness and makes the shake extra creamy.
- Vanilla Extract (1 teaspoon) – Pure vanilla extract works best. This boosts the vanilla flavor and makes everything taste richer.
- Sugar (2 tablespoons, optional) – Add this if you want extra sweetness. Taste your mixture first – you might not need it if your ice cream is already sweet.
- Pinch of Salt – This might sound weird, but a tiny bit of salt makes all the flavors pop. It balances the sweetness perfectly.
Helpful Swaps
Want to change up this recipe? Here are some easy swaps:
- Milk Options: Use almond milk, oat milk, or coconut milk for dairy-free version
- Ice Cream Swaps: Try chocolate, strawberry, or cookies and cream ice cream
- Flavor Add-ins: Add chocolate syrup, fresh berries, or peanut butter
- Sweetener Changes: Use honey, maple syrup, or sugar-free sweeteners
- Make it Healthier: Use frozen yogurt instead of ice cream
Kitchen Equipment Needed
To make this Ninja Slushi Milkshake Recipe, you’ll need:
- Ninja Slushi Professional Frozen Drink Maker – This is the star of the show
- Measuring Cups – For accurate ingredient amounts
- Measuring Spoons – For vanilla and other small amounts
- Large Spoon – For stirring ingredients before adding to machine
- Glasses – For serving your delicious milkshakes
How To Make Ninja Slushi Milkshake
Follow these simple steps to make the perfect milkshake:
Step 1 | Set Up Your Machine
First, make sure your Ninja Slushi machine is clean and sitting on a flat surface. Install the condensation catch under the evaporator by sliding it into the grooves. This catches any drips and keeps your counter clean.

Step 2 | Install the Auger
Slide the auger over the evaporator and rotate it until it clicks into place on the pin. This part mixes your ingredients as they freeze.
Step 3 | Attach the Vessel
With the bail handle up, slide the vessel over the auger and evaporator. Push the bail handle down to lock everything in place. This creates a tight seal.
Step 4 | Add the Drip Tray
Insert the drip tray in front of the machine until it clicks. This catches any spills when you pour your milkshake.
Step 5 | Mix Your Ingredients
In a separate container, gently stir together your milk, softened ice cream, vanilla extract, sugar (if using), and salt. Don’t overmix – just combine everything well.
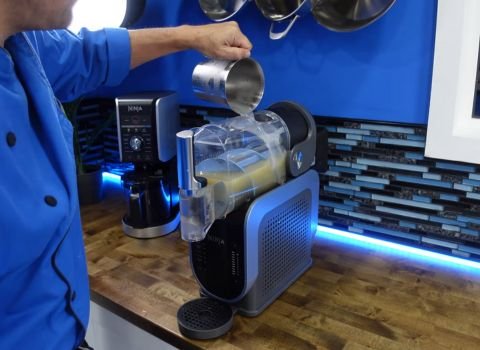
Step 6 | Add Ingredients to Machine
Open the cover on top of the vessel. Pour your mixture through the easy-fill port. Remember, you need at least 16 ounces but no more than 64 ounces.
Step 7 | Start the Machine
Plug in your machine and press the power button. Select the MILKSHAKE preset. The machine will start at the best temperature for milkshakes.
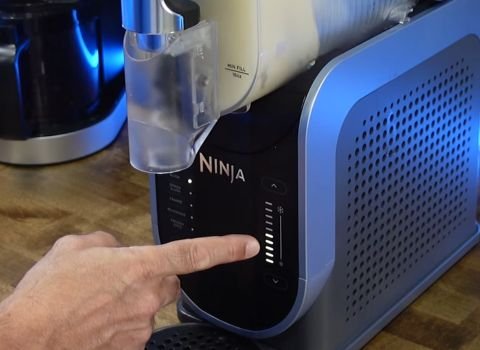
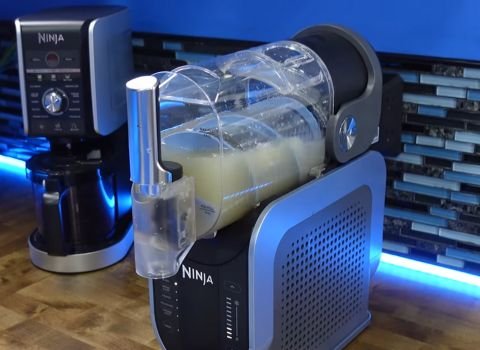
Step 8 | Wait for Perfection
The machine takes 15-60 minutes depending on your ingredients and how much you’re making. The temperature lights will pulse while it’s working. When the lights stay solid and you hear a beep, your milkshake is ready!
Step 9 | Serve and Enjoy
Place a glass on the drip tray under the handle. Slowly pull the handle to pour your milkshake. Release the handle to stop. The machine keeps your drink at the perfect temperature for up to 12 hours.
Recipe Tips for Success
Here are my best tips for making perfect milkshakes every time:
- Let your ice cream soften for 10 minutes before using
- Don’t add ice or frozen ingredients – the machine does the freezing
- Start with less sugar – you can always add more next time
- Chill your glasses in the freezer for extra cold milkshakes
- Clean your machine right after use for easy cleanup
- Try different ice cream flavors for variety
- Add mix-ins like chocolate chips after the base is ready
Ninja Slushi Milkshake Serving Suggestions
This creamy milkshake is perfect for so many occasions:
- Hot Summer Days – Nothing beats a cold milkshake when it’s hot outside
- After School Treats – Kids love this as a special snack
- Movie Nights – Perfect drink for watching films at home
- Birthday Celebrations – Make different flavors for party guests
- Weekend Brunches – Great addition to pancakes and waffles
How to Store Ninja Slushi Milkshake
Storing your leftover milkshake is easy with the right method. The Ninja Slushi machine keeps your drink at the perfect temperature for up to 12 hours, so you can enjoy multiple servings throughout the day.
If you need to store leftovers, pour them into a covered container and put it in the refrigerator. The milkshake will stay good for 2-3 days, but the texture might change slightly. Before drinking stored milkshake, give it a good stir or blend it again for the best consistency.
For longer storage, you can freeze your milkshake in ice cube trays or freezer-safe containers. Frozen milkshake cubes are perfect for blending into new drinks later.
When you want to drink frozen milkshake, let it thaw for 10-15 minutes, then stir well. The texture might be different from fresh, but it still tastes great. Never store dairy-based milkshakes at room temperature for more than 2 hours.
Ninja Slushi Milkshake Recipe FAQs
1. Can I make this milkshake without a Ninja Slushi?
You can try using a blender, but it won’t be the same. Blend 2 cups of ice with the ingredients until smooth, then serve right away.
The Ninja Slushi gives a thicker, frostier texture that’s hard to match. If you’re using a blender, add more ice cream for thickness and chill your ingredients first to get close to that slushy vibe.
2. How long does it take?
Milkshakes take 15–60 minutes in the Ninja Slushi machine, depending on batch size and ingredient temperature. Smaller, colder batches take less time.
The machine beeps and lights up when it’s done. For faster results, chill your ingredients beforehand and stick to smaller portions of 16–32 ounces if possible.
3. Can I add fruit?
Don’t add whole or frozen fruit directly. Blend fruit into a smooth puree first, then mix it in. This prevents clogging and ensures a smooth texture.
Bananas, strawberries, and mangoes work well. Pureed fruit adds sweetness, so you may need to reduce added sugar in your recipe.
4. Why is my shake too thin or thick?
A thin shake means too much liquid or not enough ice cream. For thicker shakes, reduce milk or increase ice cream. If too thick, slowly add more milk.
Use the fill port to adjust consistency while the machine is running. Balancing ingredients helps achieve the perfect milkshake texture.
5. Can I make sugar-free shakes?
Yes! Use sugar-free ice cream and avoid added sugar. Sugar-free syrups and natural sweeteners like stevia or monk fruit work well.
Start with small amounts, as these can be potent. Sugar-free milkshakes may have a slightly different texture but still offer great flavor and a satisfying result.
6. How do I clean it?
After use, pour out the shake and disassemble the machine. Wash removable parts—vessel, auger, drip tray—in warm, soapy water.
Wipe the motor base with a damp cloth; never submerge it. Dry all parts completely before reassembling. Cleaning right away prevents sticky buildup and keeps your machine in great shape.
Ninja Slushi Milkshake Recipe

Make a creamy Ninja Slushi Milkshake in just 35 minutes using whole milk, vanilla ice cream & your machine. A perfect cold treat for any time!
Ingredients
- Whole Milk – 2 cups
- Vanilla Ice Cream (softened) – 1 cup
- Vanilla Extract – 1 teaspoon
- Sugar (optional) – 2 tablespoons
- Salt – a pinch
Instructions
Step 1 | Set Up Your Machine
First, make sure your Ninja Slushi machine is clean and sitting on a flat surface. Install the condensation catch under the evaporator by sliding it into the grooves. This catches any drips and keeps your counter clean.
Step 2 | Install the Auger
Slide the auger over the evaporator and rotate it until it clicks into place on the pin. This part mixes your ingredients as they freeze.
Step 3 | Attach the Vessel
With the bail handle up, slide the vessel over the auger and evaporator. Push the bail handle down to lock everything in place. This creates a tight seal.
Step 4 | Add the Drip Tray
Insert the drip tray in front of the machine until it clicks. This catches any spills when you pour your milkshake.
Step 5 | Mix Your Ingredients
In a separate container, gently stir together your milk, softened ice cream, vanilla extract, sugar (if using), and salt. Don't overmix - just combine everything well.
Step 6 | Add Ingredients to Machine
Open the cover on top of the vessel. Pour your mixture through the easy-fill port. Remember, you need at least 16 ounces but no more than 64 ounces.
Step 7 | Start the Machine
Plug in your machine and press the power button. Select the MILKSHAKE preset. The machine will start at the best temperature for milkshakes.
Step 8 | Wait for Perfection
The machine takes 15-60 minutes depending on your ingredients and how much you're making. The temperature lights will pulse while it's working. When the lights stay solid and you hear a beep, your milkshake is ready!
Step 9 | Serve and Enjoy
Place a glass on the drip tray under the handle. Slowly pull the handle to pour your milkshake. Release the handle to stop. The machine keeps your drink at the perfect temperature for up to 12 hours.
Nutrition Information:
Serving Size: 1Amount Per Serving: Calories: 305Total Fat: 15gCholesterol: 55mgSodium: 130mgCarbohydrates: 35gSugar: 33gProtein: 7g
Did you make this Ninja Slushi Milkshake Recipe? Please leave a ⭐ rating and review!