
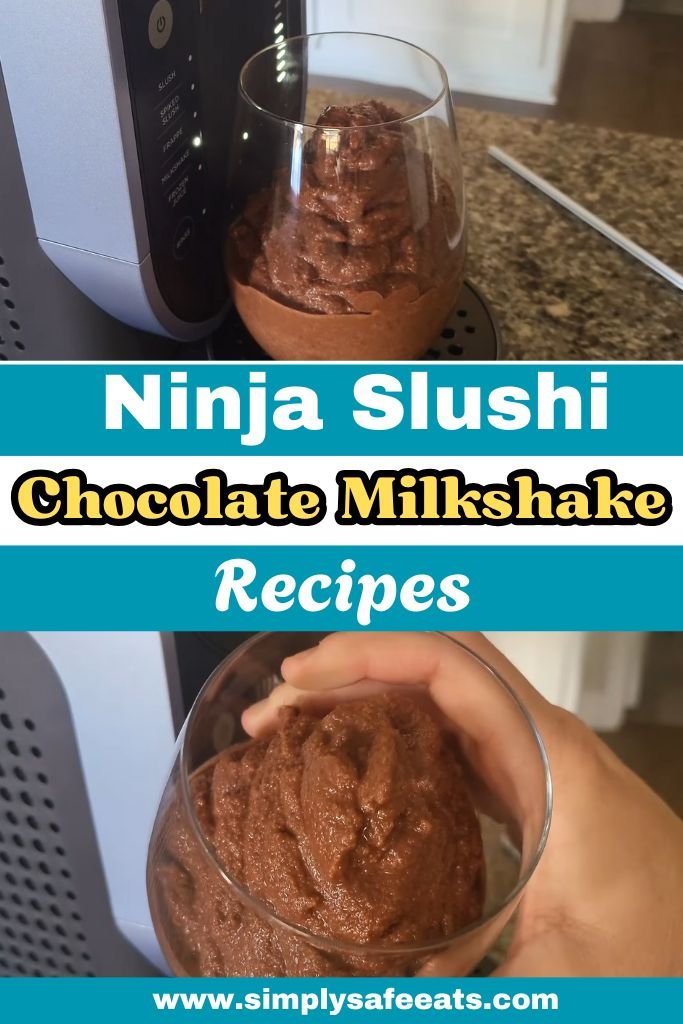
Ninja Slushi Chocolate Milkshake Recipe
This Ninja Slushi Chocolate Milkshake Recipe is a cold, creamy, and rich chocolate treat that’s simple to make using the Ninja Slushi machine.
The machine does all the hard work, turning regular chocolate milk into a thick and smooth milkshake with almost no effort.
With just a few easy ingredients, you can enjoy a homemade milkshake that tastes better than takeout.
I love making this on hot days or whenever I need something sweet and satisfying. It’s fast, fun, and perfect for all ages. No ice, no blender, no mess.
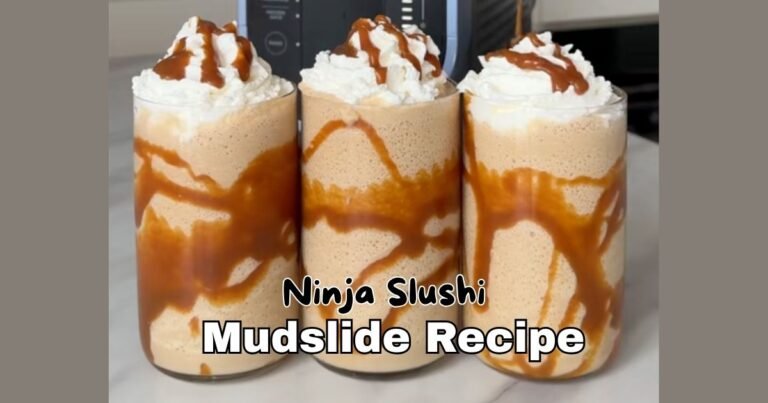
Looking for a fruity version? Try my Ninja Slushi Orange Julius Recipe — it’s just as simple and full of flavor.
Let’s get started — you’re going to love how easy this is!
Why You Love This Ninja Slushi Chocolate Milkshake
This milkshake is a total game-changer, and here’s why you’ll be obsessed:
- So Creamy: The Ninja Slushi makes it smooth and thick, like a fancy ice cream shop shake.
- Quick to Make: It’s ready in under an hour, perfect when you need a sweet fix fast.
- Bold Chocolate Taste: Every sip is packed with rich, chocolatey goodness.
- Fun for Everyone: Kids and adults can’t get enough of this cool treat.
I can’t get over how easy and delicious this milkshake is. The Ninja Slushi freezes it just right, giving you that perfect slushy texture.
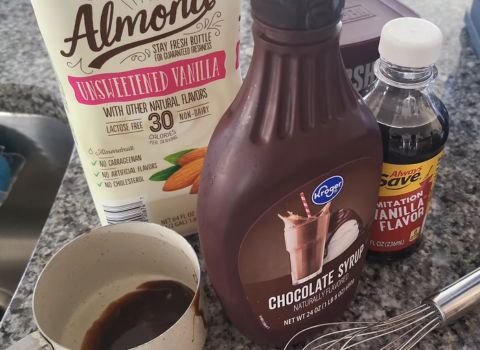
Ninja Slushi Chocolate Milkshake Ingredients
Here’s what you need to make this yummy milkshake. Each ingredient plays a big role in making it taste amazing.
- Whole Milk (4 cups): This is the base of the shake. Whole milk makes it super creamy and rich. I love how it gives that classic milkshake vibe. If you want it a bit lighter, 2% milk works, but whole milk is my go-to for the best flavor.
- Heavy Cream (1 cup): This adds extra thickness and a velvety feel. It’s like the secret to making your shake feel fancy. It helps the Ninja Slushi freeze it into a smooth, dreamy texture.
- Unsweetened Cocoa Powder (1/3 cup): This brings the deep chocolate flavor. I use unsweetened cocoa to keep the sweetness just right. It gives a bold, chocolatey punch that makes every sip amazing.
- Chocolate Syrup (1/4 cup): This adds a sweet chocolate boost. It mixes easily and makes the shake taste like a dessert you’d get at a diner. I drizzle a little extra on top for fun!
- Granulated Sugar (1/4 cup): Sugar helps the shake freeze properly in the Ninja Slushi. It also balances the cocoa’s bitterness, making the flavor pop. Don’t skip this—it’s key for the right texture.
- Whipped Cream (optional, for topping): A big dollop of whipped cream on top makes it feel like a special treat. I love how it adds a light, fluffy touch to the rich shake.
- Chocolate Sauce (optional, for drizzle): Drizzling chocolate sauce on top is so fun! It looks cool and adds a little extra chocolatey goodness. Perfect for making it Instagram-worthy.
Helpful Swaps
If you’re missing something or want to mix it up, try these swaps:
Use almond or oat milk instead of whole milk for a dairy-free shake. It’s still creamy but lighter.
Swap sugar for honey or maple syrup. They add a unique sweetness that works great.
Try caramel syrup instead of chocolate syrup for a caramel-chocolate twist. It’s so good!
Skip heavy cream and use more milk if you want a less rich shake. It’ll still taste awesome.
Kitchen Equipment Needed
You don’t need much to make this milkshake, but here’s what I use:
- Ninja Slushi Professional Frozen Drink Maker: The star of the show! It freezes the mix into a perfect slushy shake.
- Large Mixing Bowl: For whisking all the ingredients together.
- Whisk: To mix everything until smooth.
- Liquid Measuring Cup: Makes pouring milk and cream easy and accurate.
- Glasses: For serving your frosty milkshake. I use tall ones for fun.
- Spoon or Straw: Depending on how thick you like your shake!
How to Make Ninja Slushi Chocolate Milkshake
Making this milkshake is so easy, even if you’re new to cooking. Follow these steps, and you’ll have a creamy treat in no time. I’ll walk you through it like I’m right there with you!
Step 1 | Set Up the Ninja Slushi
First, make sure your Ninja Slushi is clean and on a flat counter. Slide the condensation catch under the evaporator—it’s a little tray that catches drips. Pop the auger (the spinning part) onto the evaporator and twist it until it clicks.
Slide the vessel over the auger, push the bail handle back to lock it, and add the drip tray in front. Plug it in. If it’s your first time using it, let the machine sit upright for 2 hours before starting.
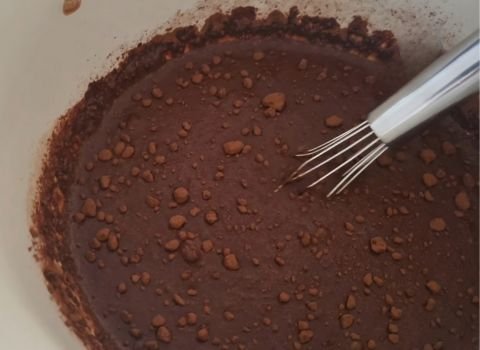
Step 2 | Mix the Ingredients
Grab a large bowl. Pour in 4 cups of whole milk and 1 cup of heavy cream. Add 1/3 cup unsweetened cocoa powder, 1/4 cup chocolate syrup, and 1/4 cup granulated sugar.
Whisk everything together until it’s smooth and the sugar and cocoa are fully mixed in. This takes about a minute—make sure there are no clumps!
Step 3 | Pour into the Ninja Slushi
Open the cover on top of the Ninja Slushi vessel. Carefully pour your milkshake mix through the easy-fill port. Close the cover tightly.
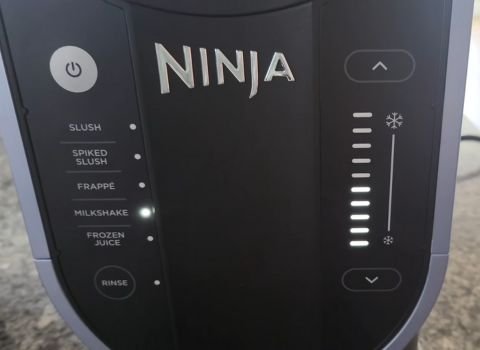
Step 4 | Start the Machine
Press the power button to turn on the Ninja Slushi. Select the MILKSHAKE preset. The machine will start at the default temperature for the best texture.
If you want it thicker, you can adjust the temperature later. The machine will beep three times when it’s ready, which takes about 15-45 minutes, depending on how cold your ingredients were.
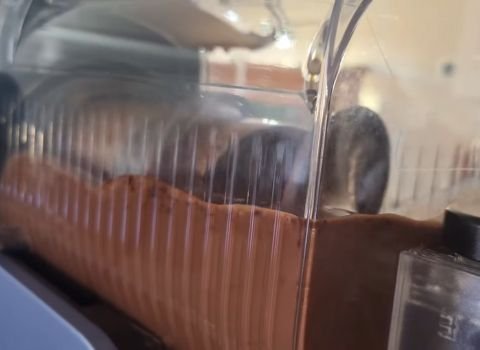
Step 5 | Check the Texture
When the machine beeps, place a cup on the drip tray under the handle. Slowly pull the handle to dispense a little shake.
If it’s not thick enough, press the up button to increase the freezing level and let it run a bit longer. I usually find the default setting perfect, but you can tweak it to your liking.
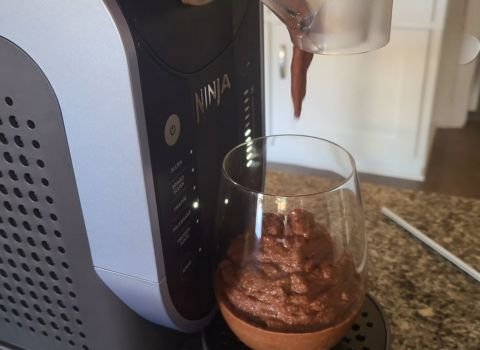
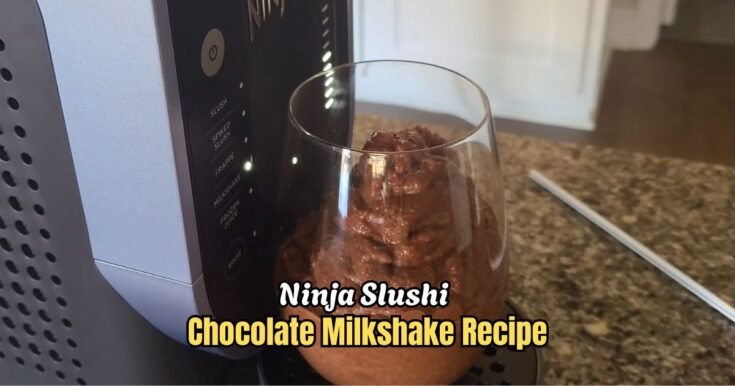
Step 6 | Serve It Up
Once it’s the right thickness, dispense the milkshake into glasses. Top with whipped cream and a drizzle of chocolate sauce if you want to make it extra special. Grab a straw or spoon and enjoy!
Recipe Tips for Success
Here are some extra tips to make your milkshake perfect. These aren’t in the steps but will help you nail it every time:
- Chill your milk and cream in the fridge before mixing. Cold ingredients freeze faster.
- Whisk the cocoa powder and sugar first to avoid clumps before adding liquids.
- Don’t add ice or frozen stuff—the Ninja Slushi works best with liquids only.
- Dispense the shake within 30 minutes to avoid a foamy texture.
- Clean the machine right after to prevent sticky buildup.
Ninja Slushi Chocolate Milkshake Serving Suggestion
This milkshake is awesome on its own, but pairing it with snacks makes it even better. Here’s what I love to serve with it:
- Cookies: Chocolate chip cookies add a sweet crunch that’s so good with the creamy shake.
- French Fries: Salty fries with a sweet milkshake? It’s a classic combo I can’t resist.
- Fruit Slices: Fresh strawberries or bananas bring a juicy, light contrast.
- Brownies: A fudgy brownie bite with a sip of shake is pure heaven.
How to Store Ninja Slushi Chocolate Milkshake
If you have leftover milkshake, storing it is super easy. Pour any extra into an airtight container or bottle and pop it in the fridge. It stays good for about 24 hours.
Give it a quick stir before serving, as it might separate a bit. For freezing, pour the shake into a freezer-safe container, leaving some space at the top for expansion. It can last up to a month in the freezer.
When you’re ready to enjoy it, let it thaw in the fridge for a few hours, then stir or blend it to get that creamy texture back. I love having some stashed away for a quick treat!
Ninja Slushi Chocolate Milkshake Recipe FAQs
1. Can I use chocolate milk instead of regular milk and cocoa powder?
Yes, you can! Using 4 cups of chocolate milk simplifies things since it’s already flavored. Skip the cocoa powder and chocolate syrup, but keep the sugar to help it freeze right.
I tried this once, and it was super tasty, just a bit sweeter. Whisk it with the heavy cream and follow the same steps.
2. Why isn’t my milkshake freezing in the Ninja Slushi?
If your shake isn’t freezing, check the sugar amount. The Ninja Slushi needs at least 8 grams of sugar per 8 ounces of liquid.
Also, make sure your ingredients are cold and you’re using at least 16 ounces of liquid. If it’s still not working, your machine might need a check-up. Mine froze perfectly after chilling the milk first.
3. Can I make this milkshake without a Ninja Slushi?
You can, but it won’t be as slushy. Use a blender with lots of ice, 1 ½ cups of ice cream, and the same ingredients. Blend until thick, but you might need to adjust the flavor.
I did this before getting my Ninja Slushi, and it was good, just not as frosty. The Ninja Slushi makes it so much easier!
4. How do I clean the Ninja Slushi after making the milkshake?
Cleaning is a breeze! Pour hot water into the vessel, press the rinse button, and dispense the water. Then, wash the vessel, auger, and drip tray by hand or in the dishwasher.
Wipe the base with a damp cloth. I do this right after to avoid sticky residue, and it takes just a few minutes.
5. Can I add flavors like vanilla or peanut butter?
Totally! For vanilla, add 1 teaspoon of vanilla extract to the mix. For peanut butter, blend in 2 tablespoons before pouring into the Ninja Slushi.
I tried peanut butter once, and it was like a chocolate-peanut butter dream. Just whisk the extra flavor in well so it mixes evenly.
6. How long does it take to make this milkshake?
It usually takes 15-45 minutes in the Ninja Slushi, depending on how cold your ingredients are. Mine took about 20 minutes with chilled milk.
The machine beeps when it’s ready, so you can do other stuff while it works. It’s so worth the wait for that creamy texture!
Ninja Slushi Chocolate Milkshake Recipe
Make a rich Ninja Slushi Chocolate Milkshake in just 35 minutes! This creamy, chocolatey delight is a perfect quick treat for dessert lovers.
Ingredients
- Whole Milk: 4 cups
- Heavy Cream: 1 cup
- Unsweetened Cocoa Powder: 1/3 cup
- Chocolate Syrup: 1/4 cup
- Granulated Sugar: 1/4 cup
- Whipped Cream: optional, for topping
- Chocolate Sauce: optional, for drizzle
Instructions
Step 1 | Set Up the Ninja Slushi
First, make sure your Ninja Slushi is clean and on a flat counter. Slide the condensation catch under the evaporator—it’s a little tray that catches drips. Pop the auger (the spinning part) onto the evaporator and twist it until it clicks. Slide the vessel over the auger, push the bail handle back to lock it, and add the drip tray in front. Plug it in. If it’s your first time using it, let the machine sit upright for 2 hours before starting.
Step 2 | Mix the Ingredients
Grab a large bowl. Pour in 4 cups of whole milk and 1 cup of heavy cream. Add 1/3 cup unsweetened cocoa powder, 1/4 cup chocolate syrup, and 1/4 cup granulated sugar. Whisk everything together until it’s smooth and the sugar and cocoa are fully mixed in. This takes about a minute—make sure there are no clumps!
Step 3 | Pour into the Ninja Slushi
Open the cover on top of the Ninja Slushi vessel. Carefully pour your milkshake mix through the easy-fill port. Close the cover tightly.
Step 4 | Start the Machine
Press the power button to turn on the Ninja Slushi. Select the MILKSHAKE preset. The machine will start at the default temperature for the best texture. If you want it thicker, you can adjust the temperature later. The machine will beep three times when it’s ready, which takes about 15-45 minutes, depending on how cold your ingredients were.
Step 5 | Check the Texture
When the machine beeps, place a cup on the drip tray under the handle. Slowly pull the handle to dispense a little shake. If it’s not thick enough, press the up button to increase the freezing level and let it run a bit longer. I usually find the default setting perfect, but you can tweak it to your liking.
Step 6 | Serve It Up
Once it’s the right thickness, dispense the milkshake into glasses. Top with whipped cream and a drizzle of chocolate sauce if you want to make it extra special. Grab a straw or spoon and enjoy!
Nutrition Information:
Serving Size: 1Amount Per Serving: Calories: 390Total Fat: 22gSaturated Fat: 14gCholesterol: 75mgSodium: 110mgFiber: 2gSugar: 32gProtein: 9g
Did you make this Ninja Slushi Chocolate Milkshake Recipe? Please leave a ⭐ rating and review!